Sep 29, 2009
Sep 26, 2009
Infragistics - Nested Tables in UltraGrid
Infragistics - Nested Tables in UltraGrid :
Note : You can download the trial version of infragistics from http://infragistics.com
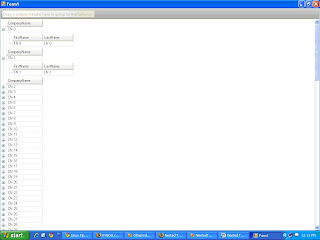
In this example, UltraGrid will show parent rows containing Company records and for each company record there will be corresponding Employee records.
First of all you need to create Employee and Company class files
Employee.cs
using System; using System.Collections.Generic; using System.Text; { class Employee { string strFirstName; string strLastName; public string StrFirstName { get { return strFirstName; } set { strFirstName = value; } } public string StrLastName { get { return strLastName; } set { strLastName = value; } } public Employee(string Fname, string Lname) { strFirstName = Fname; strLastName = Lname; } } } |
using System; using System.Collections.Generic; using System.Text; namespace NestedTableUltraGrid { class Company { string strCompanyName; List<Employee> employees = new List<Employee>(); public string StrCompanyName { get { return strCompanyName; } set { strCompanyName = value; } } public List<Employee> Employees { get { return employees; } set { employees = value; } } public Company(string Cname) { strCompanyName = Cname; } } } |
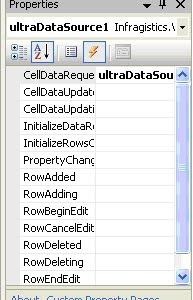
Next you’ll need to add UltraDataSource component in the form
Here UltraDataSource Designer is used in order to define DataBounds (tables), their relationship and their DataColumns (fields).
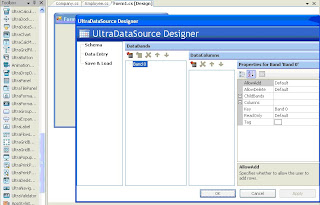
Now You’ll define a DataBand called Company with a single DataColumn called CompanyName.

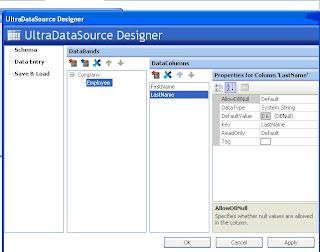
Next, you will define a DataBind called Employee with two DataColumns: FirstName and LastName.
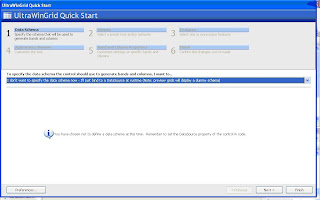
Next, you will add an instance of the UltraGrid control and bind it to the UltraDataSource component.
Click on the Finish button.
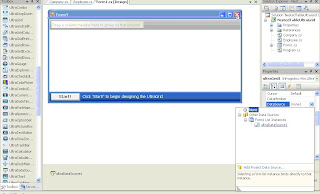
The UltraGrid control is still selected. You will set its Dock property to Fill so that the UltraGrid fills the entire area of the form.
Click on the Fill option.
The UltraGrid control provides two load styles: PreloadRows and LoadOnDemand. In this exercise, you will use the LoadOnDemand option.
Expand the DisplayLayout section.
Click on the LoadStyle down arrow.
Click on the LoadOnDemand option.
You bind the UltraDataSource component (with the schema that you defined) to the UltraGrid control by using the UltraGrid’s DataSource property.
using System; using System.Collections.Generic; using System.ComponentModel; using System.Data; using System.Drawing; using System.Text; using System.Windows.Forms; namespace NestedTableUltraGrid { public partial class Form1 : Form { List<Company> companies = new List<Company>(100); public Form1() { InitializeComponent(); } private void Form1_Load(object sender, EventArgs e) { for (int i = 0; i <> { Company company = new Company("CN " + i.ToString()); company.Employees.Add(new Employee("FN " + i.ToString(), "LN " + i.ToString())); companies.Add(company); ultraDataSource1.Rows.SetCount(companies.Count); } } private void ultraDataSource1_CellDataRequested(object sender, Infragistics.Win.UltraWinDataSource.CellDataRequestedEventArgs e) { switch (e.Column.Key) { case "CompanyName": e.Data = companies[e.Row.Index].StrCompanyName; break; case "FirstName": e.Data = companies[e.Row.ParentRow.Index].Employees[e.Row.Index].StrFirstName; break; case "LastName": e.Data = companies[e.Row.ParentRow.Index].Employees[e.Row.Index].StrLastName; break; default: break; } } private void ultraGrid1_BeforeRowExpanded(object sender, Infragistics.Win.UltraWinGrid.CancelableRowEventArgs e) { ultraDataSource1.Rows[e.Row.Index].GetChildRows(0).SetCount(companies[e.Row.Index].Employees.Count); } } } |
Run the application expand the blocks and check the Output
Sep 23, 2009
AutoComplete Textbox in Windows Application
Introduction : AutoComplete Textbox in Windows Application
This code demonstrates the use of AutoComplete Textbox in Windows Application the same way as we use Ajax in Web Applications.Pre-requisites :
Textbox properties to be set for achieving this :
1) AutoComplete Mode - You can select any from it, either Suggest/Append/SuggestAppend (In my case I have taken Suggest here)
2) AutoCompleteSource - Set it as CustomSource
3) AutoCompleteCustomSource - Its a collection
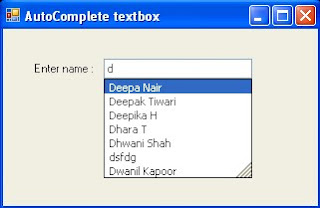
As shown in the Figure take a form with a textbox named txtname. Here I am fetching names from the database.
public partial class Form9 : Form
{
public string strConnection = ConfigurationManager.ConnectionStrings["test1"].ConnectionString;
AutoCompleteStringCollection namesCollection = new AutoCompleteStringCollection();
public Form9()
{
InitializeComponent();
}
private void Form9_Load(object sender, EventArgs e)
{
OdbcDataReader dReader;
OdbcConnection conn = new
OdbcConnection();
conn.ConnectionString = strConnection;
OdbcCommand cmd = new OdbcCommand();
cmd.Connection = conn;
cmd.CommandType = CommandType.Text;
cmd.CommandText = "Select distinct name from sample order by name";
conn.Open();
dReader = cmd.ExecuteReader();
if (dReader.HasRows == true)
{
while (dReader.Read())
namesCollection.Add(dReader["name"].ToString());
}
else
{
MessageBox.Show("Data not found");
}
dReader.Close();
txtname.AutoCompleteMode = AutoCompleteMode.Suggest;
txtname.AutoCompleteSource = AutoCompleteSource.CustomSource;
txtname.AutoCompleteCustomSource = namesCollection;
}
}
Subscribe to:
Posts (Atom)